May 13, 2020
Staff+
How should you use leveling spacers for tile wall installations

Here’s a quick, simple guide for installing wall tiles with Leveltec, Profilitec’s patented tile installation system. Leveltec is often mistakenly defined as a “spacer,” but it is actually a true leveling system that results in perfectly coplanar installations without those irritating steps between tiles.
The "Leveltec" leveling spacer used as an installation system
For fast and impeccable tile wall installations, use the Leveltec system (spacer and leveler), a handy tool that lets you install tiles quickly and easily, without those bothersome level changes between the tiles. Leveltec’s “click and level” system guarantees flawless joint lines and provides seamlessly coplanar tiled surfaces.
Installation area: how to calculate the right amount of pieces
Tiles, large and small, staggered or aligned… it’s important to use the most suitable spacer for the installation type and tile shape. Leveltec is a complete system patented by Profilitec for tile installation and leveling. The Leveltec system is composed of two accessories: a reusable cap and tie-bases (also called fasteners). There are 3 different types of Leveltec tie-bases (or fasteners): linear, T-shaped and cross-shaped.
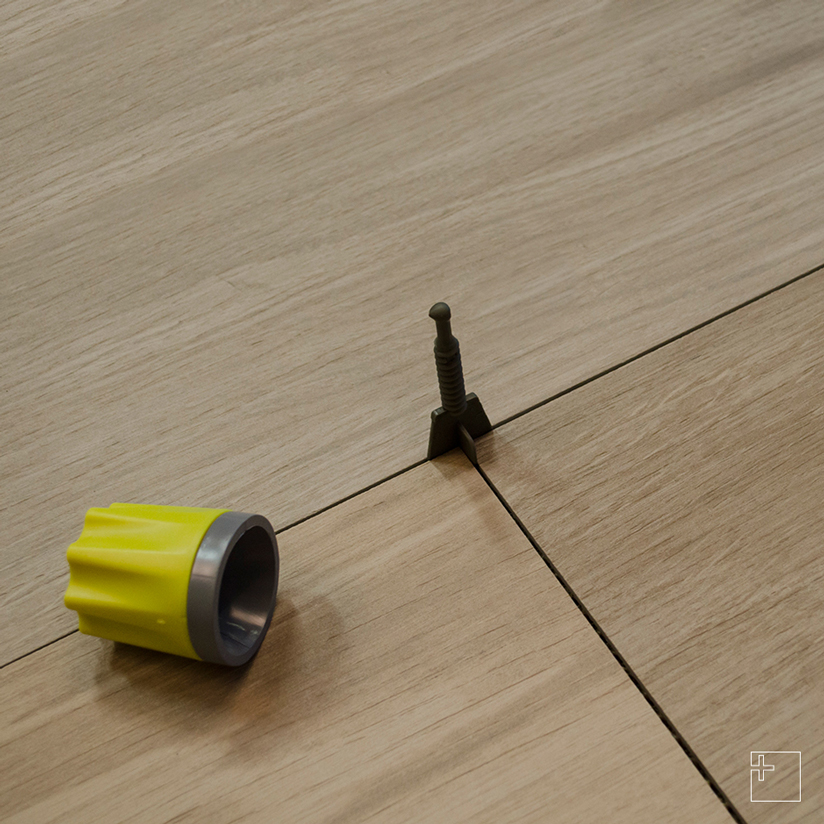
The caps, which screw onto the tie-bases, are small, ergonomic leveling cylinders which are reusable and designed to last. They are composed of an external body (a cap colored Profilitec green) and an internal body (gray plier) that snaps onto the tie-base when the external body (green cap) is pushed down.
Attaching the cap to the tie-base is foolproof: just lightly push the external cap (external body) onto the grey plier (internal body) to attach the system to the tie-base (you’ll hear a click when it attaches). In order to level the surface, just turn the cap a few degrees to raise or lower the tiles.
The tie-bases are plastic, screw-like accessories composed of a flat, wide base perfect for positioning under tiles without interfering with the adhesive. The base of the tie-base is shaped so that it sits in the adhesive for solid fastening.
The tie-bases are available in three different shapes, chosen based on the tile size and the type of installation.
Large format tile = Linear spacers
The linear tie-base of the Leveltec system should not be used in tile intersections, but rather only along the sides of the tile. Linear tie-bases are recommended for optimizing the total number of tie-bases (especially when  installing 60 x 60 cm tile), or as an additional tie-base for large tile (over 60 cm)
The number of Leveltec spacers depends on the dimensions of the tile (AxB) and can be calculated by following the table below.

Installation example:
-
30 x 30 cm tile = 44 pieces needed per square meter
-
60 x 60 cm tile = 11 pieces needed per square meter
Staggered tile = T-shape spacer

The T-shaped tie base of the Leveltec system is used in staggered tile installations, a configuration which is common when using rectangular tile and creating an offset pattern.
The number of Leveltec spacers depends on the dimensions of the tile (AxB) and can be calculated by following the table below.

Installation example:
- 12 x 60 cm tile = 23 pieces needed per square meter
- 20 x 100 cm tile = 10 pieces needed per square meter
Small tile = Cross-shaped spacer
The cross-shaped tie base of the Leveltec system is used at the intersection of 4 tiles measuring 45 x 45 cm or less. It can also be used when installing large format tile (90 x 90 cm and other dimensions, including rectangular  tile) in order to optimize the number of tie-bases (combining cross-shaped tie-bases with linear tie-bases).
The number of Leveltec spacers depends on the dimensions of the tile (AxB) and can be calculated by following the table below.

Installation example:
- 30 x 30 cm tile = 11 pieces needed per square meter
- 40 x 40 cm tile = 6 pieces needed per square meter
Installing wall tile eith leveling spacer
- After applying the adhesive on the substrate and the back of the tile, place the tie-base between the tile and the adhesive.

- Once all the tiles have been installed, just insert the cap vertically until you hear “click,” then rotate the cap a few degrees to level the tile. This method guarantees perfect leveling of the entire installation surface.

- When the adhesive is dry, remove the cap by hitting it with a rubber mallet along the direction of the joint. The tie-base will break into two pieces: the base will stay under the tile, while the upper, visible part will snap off and remain attached to the cap.

- To reuse the cap, simply push on leftover tie base and it releases automatically.

Leveltec tile installation tutorial videos
https://www.youtube.com/watch?time_continue=2&v=P8f0HIqSudo&feature=emb_title
Easy spacer installation on tiled walls
Despite continuously emerging design trends, tiled surfaces still remain immensely popular, and Leveltec leveling spacers make tile wall installations simple to achieve. Its unique, patented system uses two components: a cap and tie-bases, guaranteeing quick, effortless, solid installations never seen before.
Leveling spacer lead to an increase in wall tile installations
In modern spaces, be it indoors, public, residential or commercial, interior design is increasingly focused on the use of tile as a wall covering.
Tiles can be found in all types of settings, including bathrooms, kitchens, open spaces, living rooms, hotel receptions, restaurants, etc.
There are a myriad of reasons for using tile in interior design. Tile advantages include:
- Not affected by humidity
- Reduces mold in bathrooms
- Resistant to thermal movement
- Easy to clean
- Aesthetically pleasing
- Available in a wide variety of colors, patterns and shapes which can even be personalized
Due to the vast use of tile wall coverings, Profilitec has designed an installation system that facilitates the use of tile as a practical design element.
Comments
There is no comment


